Showing posts with label Baking. Show all posts

Wednesday, 29 August 2012

Cake Painting

Yes cake painting. That's what I like to do now. Much more preferable to painting on canvas as you get to eat it afterwards.

A while back (June 23rd to be precise) I attended a Rose Cake painting class in Berkhamsted by the wonderful Natasha of Nevie Pie Cakes and the blog Amelie's House. Natasha is an incredible artist and baker who uses food colouring to paint masterpieces on her edible items. I hope I didn't come across as too much of a fan girl on the day as I truly admire all of Natasha's work; there is nothing quite like it out there in the world of cake decoration.

The class was incredible and if cake decorating is your thang then I highly recommend it. Natasha had printed out a step by step guide for the cookie toppers and big cake and repeated each step for us on her own fondant before letting us have a go on our fondant cookie toppers and dummy cake. While we all painted away Natasha walked round the room and helped out each classmate individually; if only all teachers were like that.

The class was a lot of fun but it was quite intensive as you are painting all day long and some artistc ability is necessary (not that I have much) to be able to actually paint the designs. Saying all that though I like to think that my efforts weren't too shabby. (I won't put pictures on here of Natasha's original rose cake as then you'll see just how pants my efforts actually are - you'll just have to visit Nevie Pie cakes to have a nose yourselves.)


Rose Cake Decoration


Cookie/ Cupcake Toppers

To find out more about Nevie Pie cake classes please visit the website and subscribe to the newsletter. 

Currently Natasha is offering two basic cake painting classes, a ruffle cake class and the amazing eat your heart out class (where you learn to paint a blackened smokers lung cake; true story). Believe me Nevie Pie cake classes are well worth the money (especially for the tasty spread that Natasha puts on for your included lunch) and are a truly enjoyable day out.


Love
Madame Squirrel


Monday, 9 April 2012

Vanilla and Raspberry Jam Cupcakes with Pink Buttercream Roses

One day, one glorious beautiful fine day I will bake the perfect cupcake...again. 2 years ago I managed it. The most perfect, moist, light and fluffy cupcakes and not just one but 40 of them! I baked them for Monsieur Squirrel's brother's wedding. I used the infamous Hummingbird Bakery vanilla cupcake recipe and the bad boys that came out of the oven were perfect. They were perfect in height, perfectly cooked and the taste, oh the taste. Light, fluffy, moist and vanillary (yeah that is a word).


Check out my measuring matroyshka nesting
 doll cups. They are my best friends when I'm baking.

We moved out of that house a couple of months later. I wish I'd baked so many more cupcakes in that oven because since then I haven't baked one perfect cupcake. NOT ONE. And it hurts. Oh it hurts. It haunts my dreams. I feel like every cupcake I see mocks me; and boy are they cruel.


Just out of the oven...before they sunk.

Why does my favourite hummingbird recipe not work anymore? (I have whined this to Monsieur Squirrel a lot; it is not a pleasant sound). So far I've tried the hummingbird recipe 4 bluming times using our current oven. Each time they shrink and are chewy. When they failed the first time, I thought it was because the ingredients hadn't been at room temperature. The second time; because I used the oven fan. The third; I hadn't filled the liners properly. The forth; I just blamed the oven and searched for a new recipe.


Filled with raspberry jam.

The next vanilla cupcake recipe I used worked ok; they were too dense but at least they rose.


Icing! Monsieur said my icing looked like MRM (mechanically recovered meat?!). Always the charmer!


On Saturday I decided to try the ultimate vanilla cupcake recipe. This recipe has been tested by 50 bakers (and I'm sure a lot more have tested it by now too).


Not looking too shabby (but a little bit, dare I say it,like lady parts?)


The recipe: Taken from the cupcake project.com 


Makes around 12 - 16 cupcakes 

  • 1 cup (225 grams) granulated sugar 
  • 1 vanilla bean
  • 1 3/4 cups (175 grams) plain flour, not self-rising
  • 1 1/2 teaspoons baking powder
  • 1/2 teaspoon baking soda
  • 1/2 teaspoon salt
  • 1/4 cup (57 grams) unsalted butter, room temperature
  • 2 large eggs, room temperature
  • 1/3 cup (75 grams) full-fat sour cream
  • 1/4 cup canola oil or vegetable oil (60 ml)
  • 1 tablespoon pure (not imitation) vanilla extract
  • 2/3 cup (160 ml) whole milk
  1. Preheat oven to 350 F (175 C).
  2. In a small bowl, combine sugar and seeds from the vanilla bean. 
  3. Using the back of a spoon, move around the bowl and apply pressure to break up any clumps of seeds and to better infuse the vanilla flavor into the sugar. Set aside.
  4. In a medium-sized mixing bowl or bowl of a stand mixer, mix together cake flour, baking powder, baking soda, and salt.
  5. Add the vanilla bean sugar and mix until well combined.
  6. Add butter and mix on medium-low speed for three minutes. You should end up with a very fine crumb texture.
  7. In a small mixing bowl, whisk together the eggs, sour cream, oil, and vanilla extract until smooth.
  8. Add the egg mixture to the flour mixture and beat on medium speed until just combined.
  9. Slowly add milk and mix on a low speed until just combined. The batter will be quite liquidy.  
  10. Fill cupcake liners just over 1/2 full.
  11. Bake for 14 minutes and then test to see if they are done. These cupcakes shouldn't turn a golden brown.  If they aren't done, test again in two minutes.  If they still aren't done, test again in another two minutes.
  12. When the cupcakes are done, remove them immediately from the tins and leave them on a cooling rack to cool.
Note: I didn't use a vanilla bean in mine; if you can't afford it, just use a tiny bit more vanilla essence

So this is when I did my own recipe thang and added raspberry jam:

1. Once the cupcakes have cooled make a cavity in the middle of the cupcake using a teaspoon. Try to do this in one movement, so you have a whole tiny piece of cake that you have removed (set aside).
2. Insert half a tea-spoons worth of raspberry jam into the cavity.
3. Take the cake you've removed and place it back into the cupcake, covering the raspberry jam.

(Another way to do this is using a fine nozzle; place the raspberry jam into a decorating bag and insert the nozzle into the centre of the cupcake and squeeze gently)

Icing:

I used the Hummingbird Bakery's vanilla buttercream icing recipe and added 4 drops of pink food colouring. I then used the Wilton 2D icing nozzle and a disposable decorating bag to make the rose detail. Squeeze the icing from the centre of the cupcake outwards (angling the nozzle tip inwards)in a spiral pattern. 

I will discuss icing techniques a bit more in my next cupcake inspired post!

Pink Vanilla Buttercream Icing Recipe:

500g icing sugar
160g unsalted butter softened
50ml whole milk
Half tsp of vanilla essence
4 drops of pink food colouring

The verdict: Not quite ultimate but alright.

These taste amazing, and I thought they looked great but they are too moist and dense. Also they didn't rise; if anyone has a solution for non-rising cupcakes (a cupcake viagra so to speak) I am all ears. I'm just going to blame my oven again and purchase an oven thermometer!! The hunt continues for the perfect cupcake....

Love
Madame Squirrel.

Sunday, 8 April 2012

Madame Squirrel's Weekly Report 5

This Week I...

Ate my weight in food:


Check out that grilled cheese sandwich; it was too good.  As always, I burnt my lip as I refused to let it cool and ketchup is lethal when it is the temperature of the sun. 

Tips for the best grilled cheese sandwich:
-use a non-stick frying pan.
-butter the outside of the bread.
-cook it low and slow for 8-10 minutes each side. 

It will damage your arteries but it is so worth it. 

I managed to cancel out my artery damage by eating a lovely salad (as you can see from the photographic evidence) that my friend made (manages to omit that the aforementioned salad contained cut up chicken kiev). I then redid the artery damage with a fried egg and bacon sandwich (I think the fact it was made with gluten free bread makes it healthy though right?). Note: I did not eat all these items on the same day but I would if I could.

I am also completely and utterly addicted to chilli rice crackers...I need to find a supplier that can provide my fix for a lot less (Waitrose Y U so expensive?).

Had to include a standard photo of the easter eggs I received (they are mostly destroyed now).

Enjoyed making some easter treats: 


Classic Chocolate Cornflake Nests:

Recipe:

Mini eggs (obvs)
Cornflakes 75g
Dark Chocolate 100g
Golden Syrup 4 Tbsp
Butter 50g

*Melt butter, golden syrup and dark chocolate in a non-stick pan.
*Eat at least 6 mini-eggs while waiting for the melting to occur. 
*Stir in cornflakes. 
*Add mixture to cupcake cases (will fill about 12).
*Eat most of the mixture off of a large wooden spoon. 
*Make a nest shape and plonk in mini eggs. 
*Leave to cool and set for 30 mins to an hour in the fridge. 
*Nom them all.

Admired my beautiful new clutch from warehouse; come to mama!


Got my bake on cupcake style: 


Stay tuned for a post on these raspberry jam vanilla rose cupcakes (that's a mouthful) next week. 

I hope you have all had a choctastic Easter weekend :)

Love
Madame Squirrel.


Saturday, 17 March 2012

The Making of: Chocolate Chip Cookie Pie

So I decided to bake the chocolate chip cookie pie from my 'What shall I bake?' post...


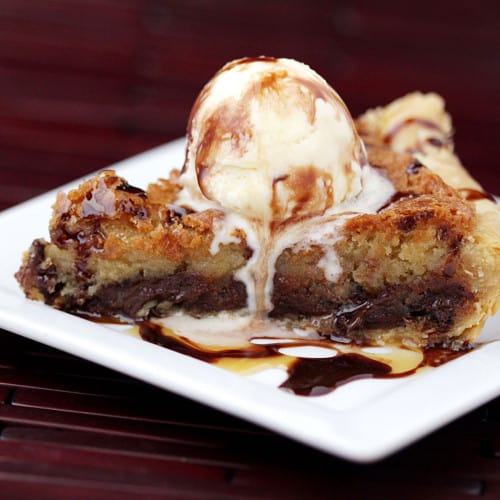
And it is good, soooo good. I'm talking treacley, chocolatey and melty. I am slightly euphoric after eating so much, I am just waiting for the sugar crash.
If only the journey in making it was as easy as eating it.


Take 1.


Everything was going right, fine the making of the pie didn't look as gorgeous as Love From The Oven's but every recipe stage looked good enough. Oven 375°F? Check. Ready made pie case? Check. Filling made? Check. Removal of pie case silver foil? Check....that is where I went wrong. I checked on the pie's progress after about 10 minutes of it being oven bound. EPIC FAIL. One side of the pastry case had completely collapsed flooding the oven with cookie filling. It was everywhere...even on the kitchen floor as it had somehow dripped all the way through the oven?!


Take 2.


This time I used ready to roll pastry (Monsieur Squirrel went to three supermarkets to find some; he really is dedicated to my baking), and cooked the pie in a glass pie dish.
It worked. Luckily the pie filling is so easy to make and all I (Monsieur Squirrel) had to find were more chocolate chips so I wasn't too fed up with having to make it again. And the results were sooooo worth it.


The Photographic Evidence:
Foamy Eggs
Dark Chocolate Chips & Honeycomb
Baking Up A Treat
Yum
First of many slices;
just perfect with vanilla ice-cream
The Recipe: Chocolate Chip Cookie Pie from ' Love From The Oven'.


Baking Playlist:


The Same In Any Language: Ruckus


Fallin' And Flyin': Jeff Bridges and Colin Farrell


The End: Mayday Parade


What It Is: Mark Knopfler


Airplanes: B.O.B


Straight Outta Compton: N.W.A


Butterflies: Tone Damli


Learning To Fly: Tom Petty

Tuesday, 13 March 2012

What Should I Bake?

This weekend I think partaking in a spot of baking is on the cards.

But what to bake?

I have so many baking books and baking bookmarks; not to mention the amount of recipes on my pinterest board sweet treats. It really is a bit difficult to decide what to try (first world problems anyone?)

Here's a selection of what I may attempt, sorry if it makes y'all hungry! For any baking/foodie nuts out there check out the delicious blogs attached to these recipes, they are well worth the read and follow!


Picture by Joy the Baker
Joy has also just released the Joy the Baker Cookbook: I cannot wait to get my grubby mitts on it!


Picture by Love From The Oven
I am literally not metaphorically drooling.


Gluten-Free people and chocolate lovers get your bake on with me with this recipe.

Picture by Inspiring The Everyday


Photo from Tastespotting by YummyWorkshop

I know I won't be able to make these this weekend as I still haven't got any Matcha Green Tea Powder (I need this for so many recipes I want to make). But for those of you who have, you must make this recipe! Yummy Workshop also gives amazing tips on how to make perfect macarons in this post, so it's also well worth the read for any macaron makers out there.

All these recipes are from American blogs but as far as I can see we can get all the ingredients here in the U.K. As far as measurements go there are plenty of conversion charts online if you don't own cups. 

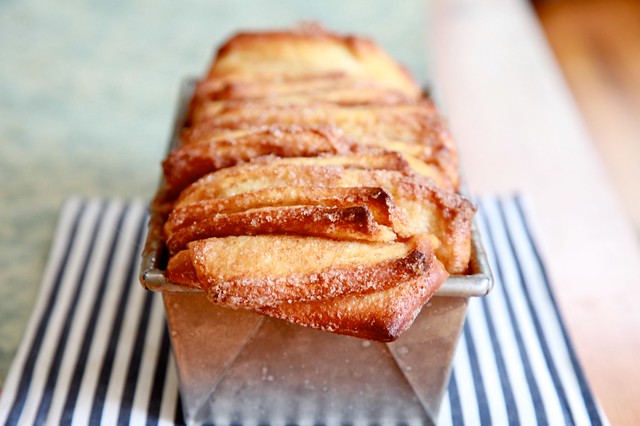
What do you think I should bake? Does the cookie pie get your vote, should I attempt the pull apart bread or just chocolate it up? Anyone else got baking/foodie plans this week/weekend? 

Love
Madame Squirrel.

Wednesday, 7 March 2012

Madame Squirrel Bakes A Cake

Hello World.

I thought for my first blog post that I would tempt you all in with some "beautiful" pictures of cake. 
Blueberry Cake in fact.

The recipe I used is from: 'The Hummingbird Bakery Cookbook' or My Bible as I tend to call it. I love The Hummingbird Bakery; I wish there was one on every single street across the entire world. Yes I would get incredibly fat as resistance would be futile but it would be worth it, I promise you it would be worth it.

Now that I've revealed my obsession with The Hummingbird Bakery and cake in general I'll get on with showing you what I baked shall I?

The Photographic Evidence:

Straight out of the oven and looking a bit terrifying:


At this point I had completely forgot that I had to turn the ring tin upside down, I was trying to figure out how the hell I'd ice this thing.

But I did turn it upside down and look how cake looking it is:


Ice(d), Ice(d) baby (yes there is a lot of edge blur going on).


Mmm...moist and delicious.

Now the recipe called for 6 eggs. Which I think is a hell of a lot of eggs; I also used particularly rich tasting ones, so the next time I may only try this recipe with 4 and hope for the best.

The recipe also calls for "2 tablespoons plus 2 teaspoons baking powder" which I thought was a lot of baking powder. I only used the 2 teaspoons assuming a misprint but after looking online at other peoples attempts; no one mentions it. Next time I will add all the baking powder and see if it makes the cake lighter (or simply rise for the heavens).

I also baked the cake for *ahem* 15 more minutes than it should have been baked for ... every time I put the skewer in to test the cake it came back out covered with runny cake mix. I now think I may have been putting the skewer too near to the blueberries, so the mixture was coming out still runny due to blueberry moisture leakage (that sounds appetising). Really I should have just obeyed the recipe and used their technique of testing for golden bouncy sponge with a finger instead of skewering the cake in a murderous fashion.

All in all this cake is nomtastic but make sure you have lots of people to feed it to as it is so rich (in an incredibly delicious way). 

The Recipe:

Blueberry Cake (taken from 'The Humming Bird Bakery Cookbook')

350g unsalted butter at room temperature (always room temperature people or it just won't work)
350g caster sugar
6 eggs
1 teaspoon vanilla extract
450g plain flour
2 tablespoons plus 2 teaspoons baking powder
280 ml soured cream (bringing the moistness)
250g fresh blueberries plus extra to decorate
2 quantities Cream Cheese Frosting (recipe below)
Icing sugar, to decorate

A 25cm ring mould, greased and dusted with flour

Makes 12-16 slices.

Preheat the oven to 170°C (325°F) Gas 3.
Put the butter and sugar in a freestanding electric mixer with a paddle attachment (or use a handheld electric whisk) and cream until light and fluffy. Add the eggs one at a time, mixing well and scraping any unmixed ingredients from the side of the bowl with a rubber spatula after each addition. Beat in the vanilla extract, flour and baking powder until well mixed. Add the soured cream and mix well until everything is combined and the mixture is light and fluffy.

Gently stir in the blueberries by hand until evenly dispersed.

Pour the mixture into the prepared ring mould and smooth over with a palette knife. Bake in the preheated oven for 40 minutes or until golden brown and the sponge bounces back when touched. Leave the cake to cool slightly in the mould before turning out onto a wire cooling rack to cool completely.

When the cake is cold, put it on a serving plate, cove the top and sides with the Cream Cheese Frosting and decorate with more blueberries. Dust with a light sprinkling of icing sugar.


Cream Cheese Frosting

300g icing sugar, sifted
50g unsalted butter, at room temperature
125g cream cheese, cold

Makes enough frost 12 cupcakes
(double the recipe for 20-cm cake)

Beat the icing sugar and butter together in a freestanding electric mixer with a paddle attachment (or use a handheld electric whisk) on medium-slow speed until the mixture comes together and is well mixed. Add the cream cheese in one go and beat until it is completely incorporated. Turn the mixer up to medium-high speed. Continue beating until the frosting is light and fluffy, at least 5 minutes. Do not overbeat, as it can quickly become runny.

At this moment in time The Hummingbird Bakery Cookbook (Ryland, Peters & Smallis available from amazon.co.uk for only 10 whole British Pounds.

What are you favourite recipes? Any tips for baking a perfect cake?

Love
Madame Squirrel.